


Totality in Maine
The Total Solar Eclipse was amazing!

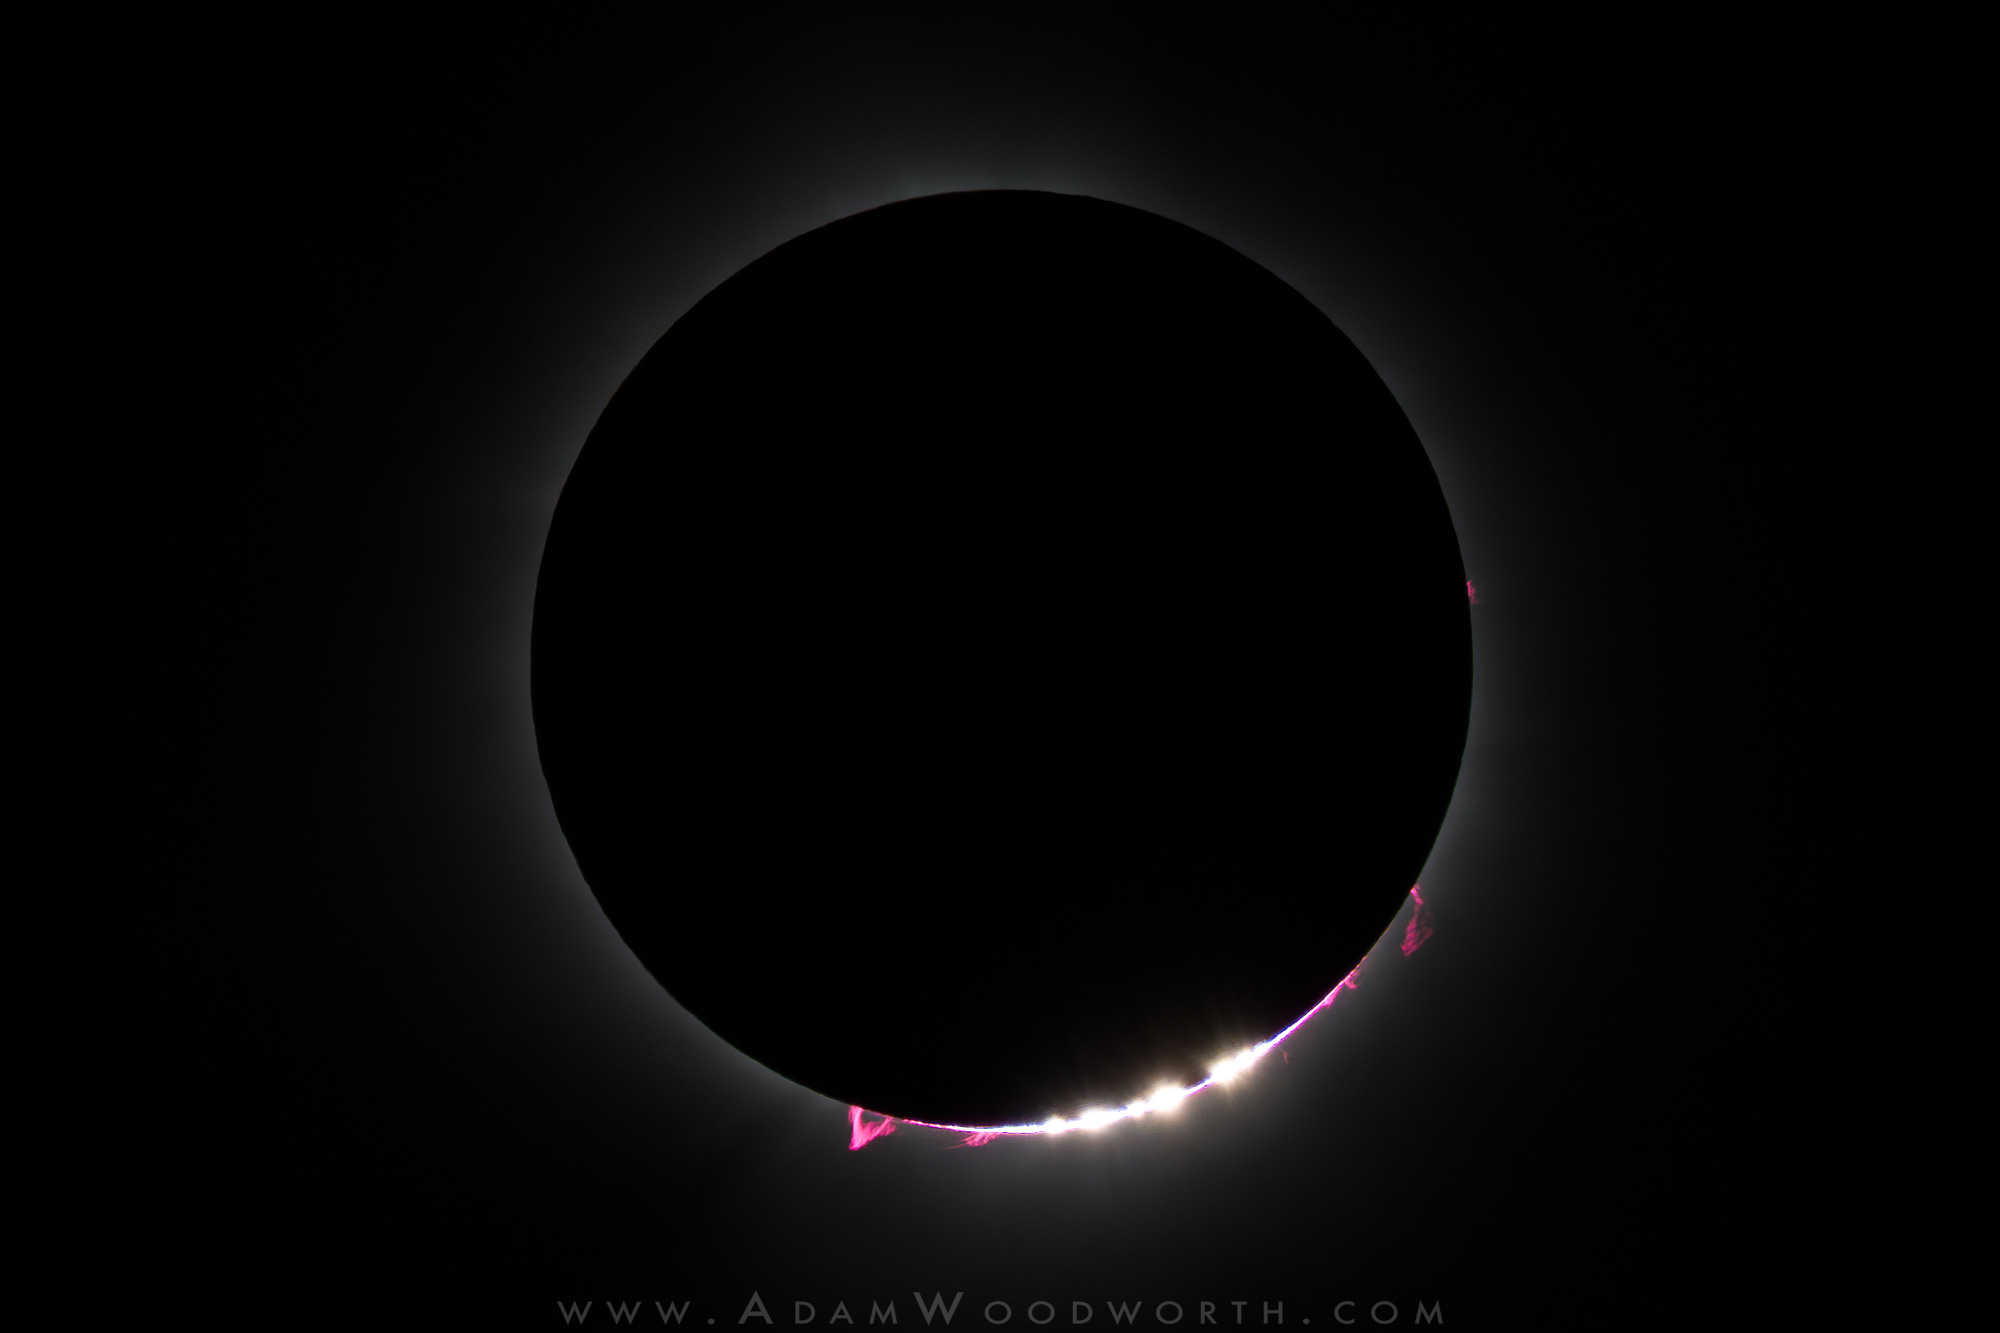
Baily’s Beads and Prominences
Witnessing the total solar eclipse is something I will never forget. Watching what looked like a black hole in the sky during totality was just insane, far and away the most amazing thing I’ve witnessed in nature. All the pictures don’t do it justice, the experience can barely be explained. And watching it in my home state of Maine was extra special!
Baily’s Beads are caused by the mountains and valleys of the moon causing breaks in either the last bit of light before the moon completely covers the sun, or as in this case the first bit of light as the moon starts to move past the sun. The pink things jetting out into space are solar prominences, which are strands of plasma blasting out into space from the sun caused by the sun’s magnetic fields. I could actually see the bigger prominence to the left of the beads with my naked eye during totality. I did not expect to see any prominences with my eye, so that made the already special event even more special.
Nikon Z7 with NIKKOR 200-500mm lens @ 500mm and f/8, ISO 200, 1/4000th sec. This is a mega-crop from the much wider original 500mm shot.
Please pardon the banding or pixelation artifacts that you may see in these dark images, it is Substack adding too much jpeg compression. To see the images in higher quality, go to adamwoodworth.com/photos and type in “eclipse” in the search box on that page.
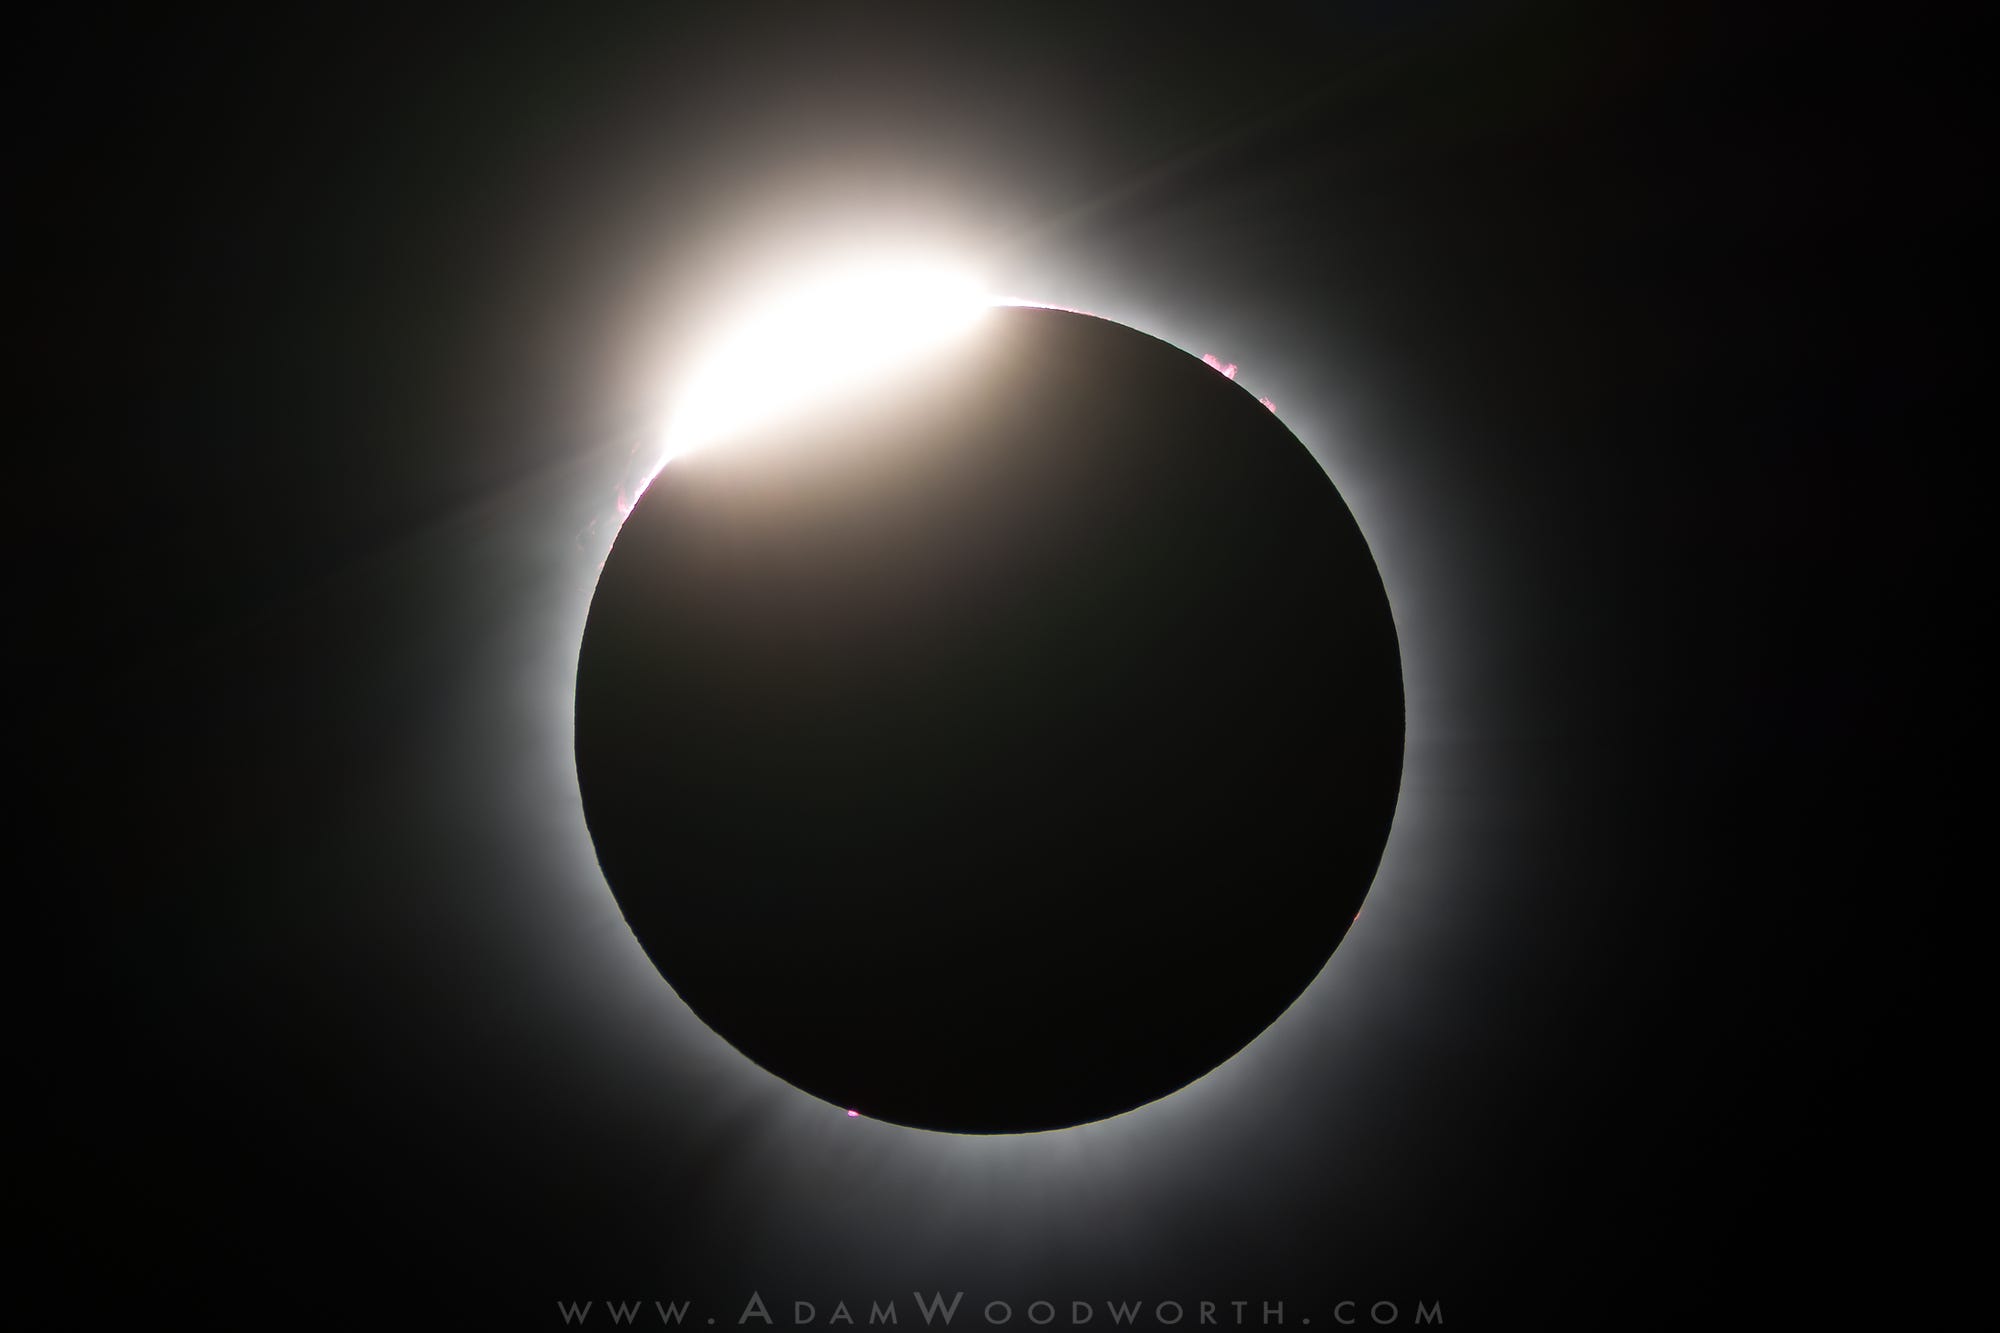
Diamond Ring
The famous “diamond ring” effect as the last bit of light of the sun is blocked as the moon covers the sun. This occurs just after Baily’s Beads as the moon completely covers the sun, or just before the beads as the moon moves past the sun.
Nikon Z7 with NIKKOR 200-500mm lens @ 500mm and f/8, ISO 200, 1/500th sec. This is a mega-crop from the much wider original 500mm shot.
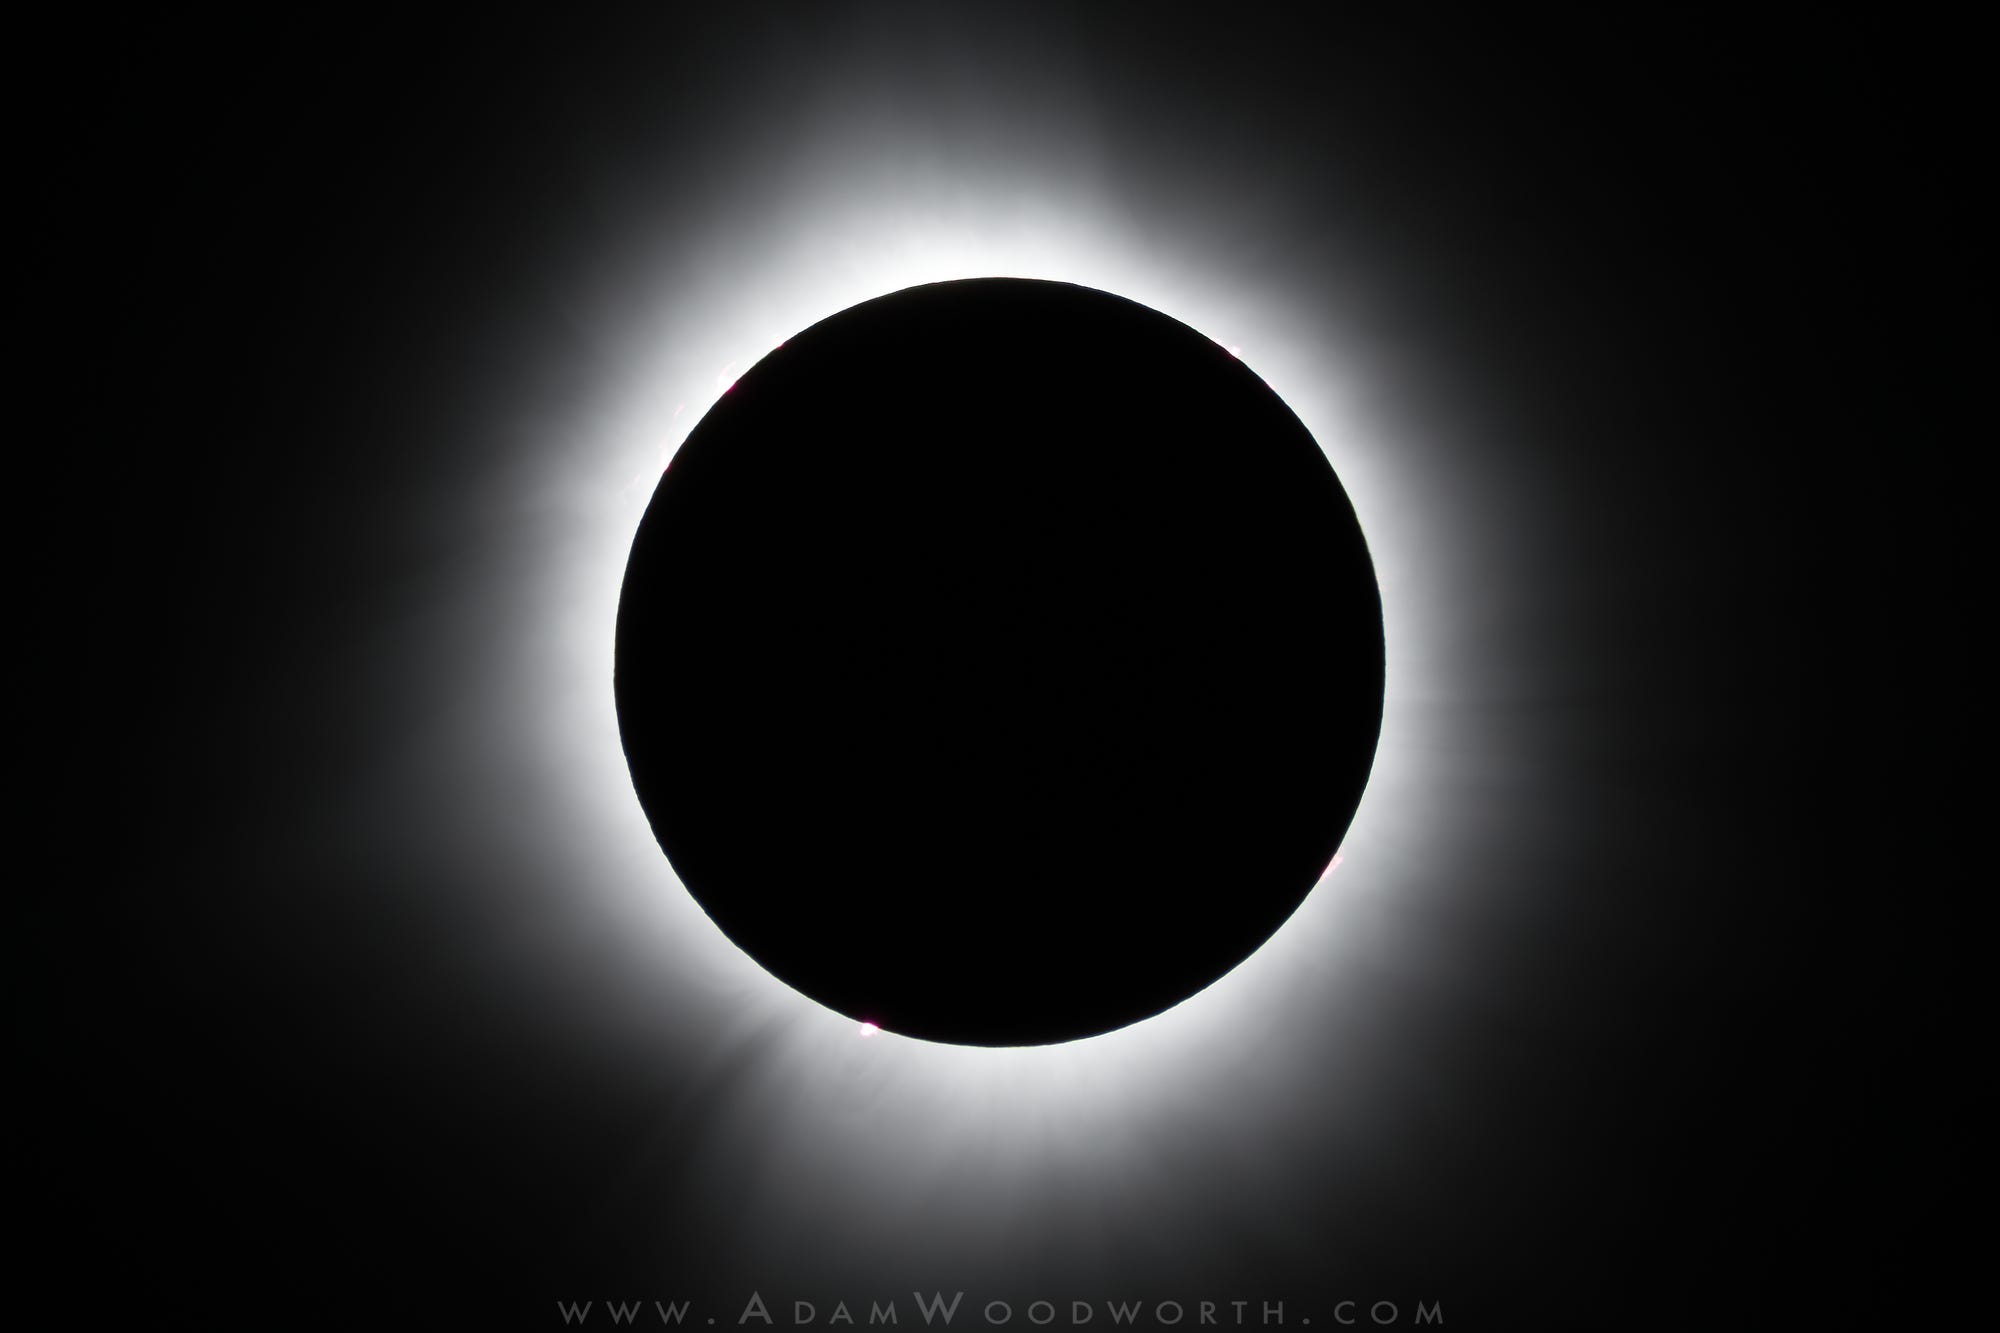
Totality
Nikon Z7 with NIKKOR 200-500mm lens @ 500mm and f/8, ISO 200, 1/125th sec. This is a mega-crop from the much wider original 500mm shot.
I used Alan Dyer’s Eclipse Book as my primary reference for figuring out how I was going to shoot the eclipse. I knew I wanted to do both close ups like these and a wide angle shot of the landscape with the “black hole” sun at totality (cue Soundgarden). From Alan’s book I settled on techniques for both. For the close-ups I used manual settings of f/8, ISO 200, and 1/2000th of a sec for the partial phases. About 1 minute before totality I took the NiSi solar filter off the 200-500mm lens and enabled 9-stop auto-bracketing and started blasting away with high speed burst mode to capture the diamond ring, beads, and totality. I used my remote release and held the shutter button down and just hoped for the best while I enjoyed the eclipse as much as possible, checking the images very quickly a couple of times. I put the solar filter back on roughly 1 minute after totality and disabled auto-bracketing to go back to partial phases. The auto-bracketing adjusted the shutter speed up and down 4-stops in each direction, centered around my manual settings, so I just hoped one of those exposures would be the right settings to capture the beads and diamond ring. Many thanks to Alan Dyer for his amazing and very detailed e-book.
I chose ISO 200 instead of the base ISO of 64 so that the “base” exposure during the auto-bracketing would be 1/2000th of a sec, giving room for 1/4000th and 1/8000th shutter speeds in the bracketing. I used f/8 because that was much sharper than wide open at f/5.6 with the 200-500mm lens. I knew this might cause a little flaring around the beads as Alan warned about in his book, but I figured I would remove the flaring in post if I wanted to (so far I haven’t), but more importantly I wanted the outline of the sun, beads, and prominences to be a sharp as I could get.

Totality Over a Lake
This is a vertical crop of one of the raw files that make up the timelapse that is linked below.
Totality Timelapse
This timelapse is a reasonable approximation of what the eclipse looked like in person, although words cannot describe the insane feeling of being there during totality.
I knew I wanted to get a shot of the eclipsed sun at totality over the landscape. I decided on doing a timelapse based on the ideas in Alan Dyer’s Eclipse Book. I setup the camera to use the internal interval timer to take a photo once every second in aperture priority mode, so that it would automatically adjust the shutter speed as the scene darkened through totality and then ramp back up after totality. I started the interval timer about 9 minutes before totality and walked away, just hoping it would all work out and that I would also get well exposed photos during totality that I could use for a static landscape shot. In the end I used 460 of the exposures to create this 15 second timelapse video.
Nikon Z6 with NIKKOR Z 14-30mm S lens @ 20mm, f/5.6, ISO 200. Shutter speed varied. I used ISO 200 in hopes it would be enough to prevent exposures longer than 1 second during totality so I would not be missing frames when taking 1 per second, which would have resulted in stutter in the timelapse. Good thing I did, the longest exposures during totality were 1/2 second. Final timelapse assembled in TimeLapse DeFlicker (TLDF).
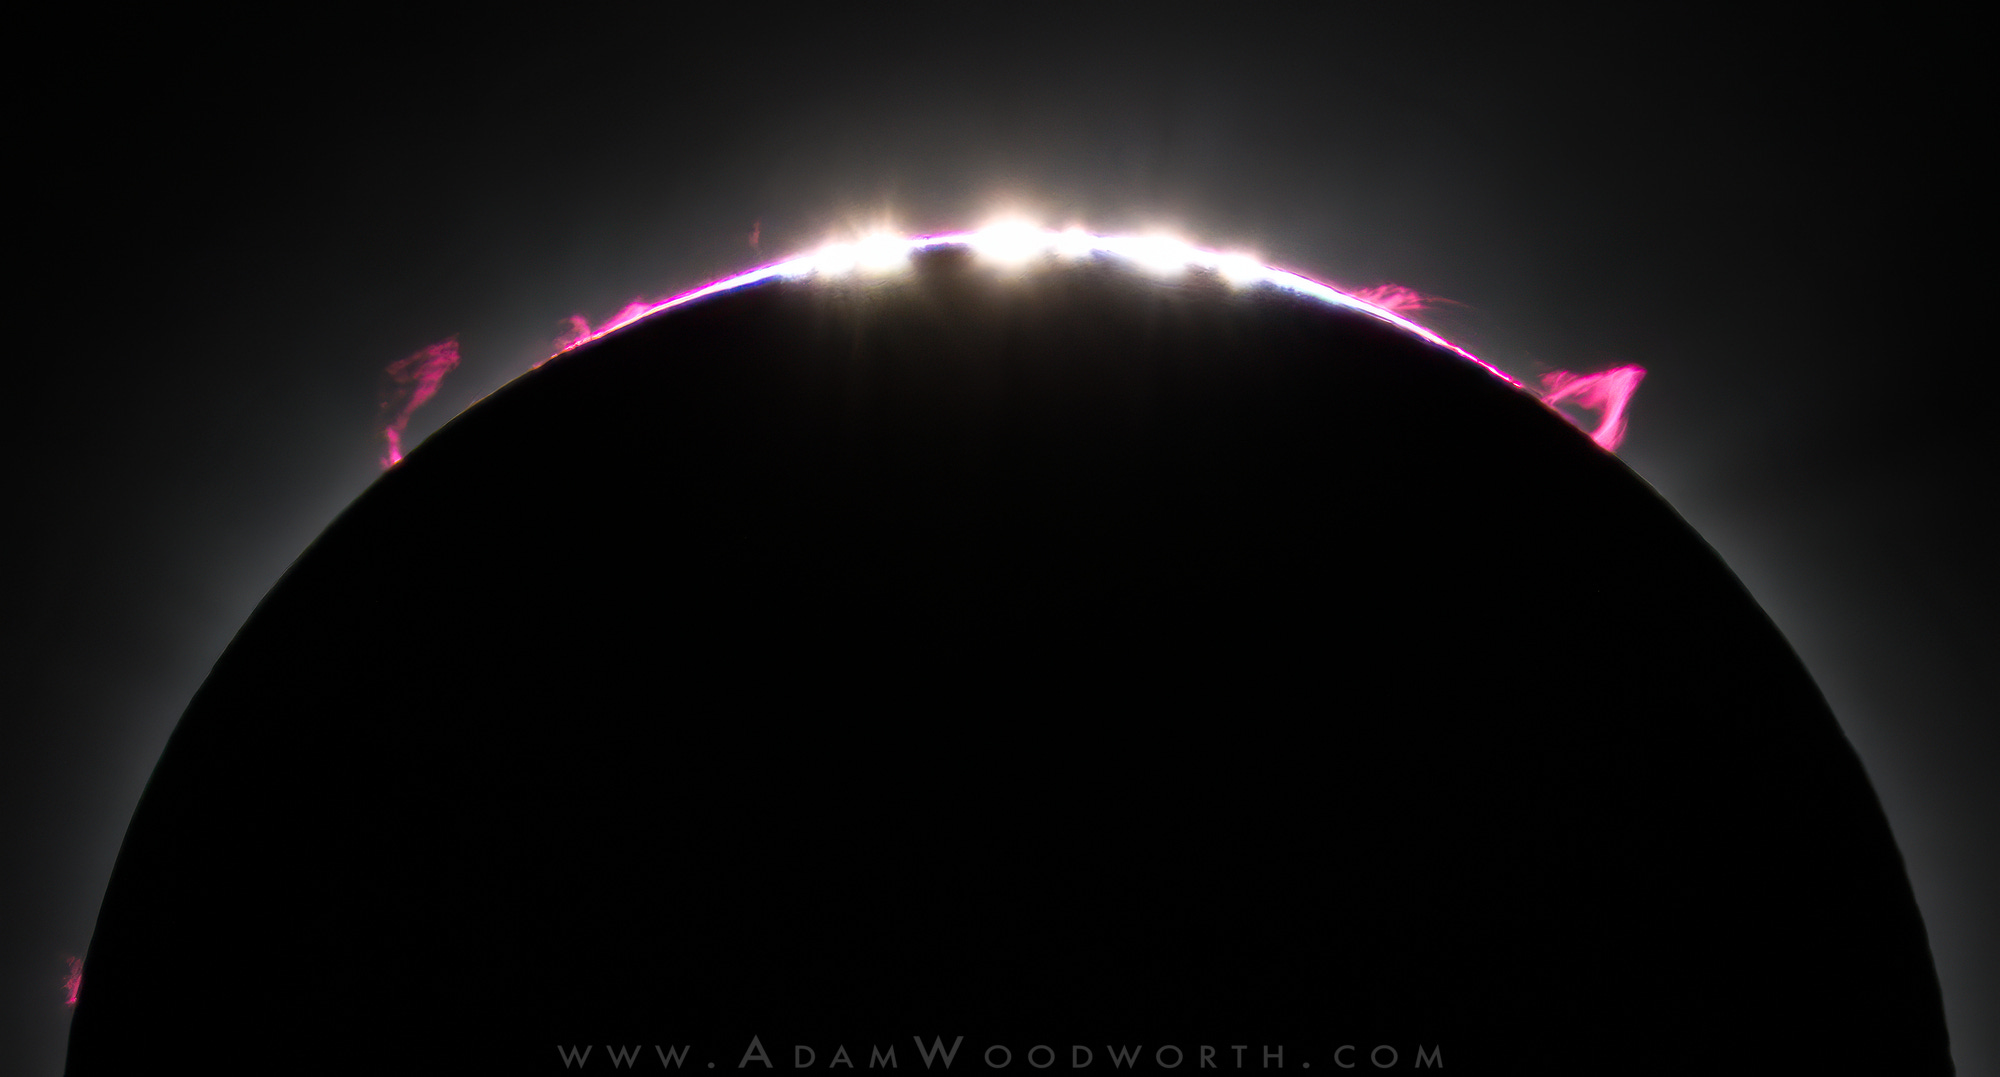
Baily’s Beads and Prominences Mega-Crop
I rotated this mega-crop of my Baily's Beads and Prominences photo to center and balance the beads and prominences in the frame. My original edit was already a mega-crop of the raw shot at 500mm. This crop ended up being a tiny 1168x629 pixel image, so I upscaled it 4x in Topaz Photo AI. It did a decent job of giving detail back to the prominences.
My Book!
My book Night Sky Photography recently passed 400 ratings on Amazon! Plus it is somewhere around 10,000 units sold worldwide. Thank you to everyone who purchased it, I hope you’ve enjoyed it!
Happy Shooting!
Adam
adamwoodworth.com
Adam, killer job with this eclipse summary and congratulations on landing such a great spread of work from totality! Processing looks clean too.
Congrats on these photos, Adam. Very beautiful!